A price tracker or a price monitor helps you keep track of product prices. There exist two ways to build a price monitoring tool. You can either use an e-commerce website’s APIs to get prices or create a web scraper that runs periodically.
Though convenient, APIs are limited in what they can provide based on the provider. Web scraping is more flexible but a little more challenging to build.
This tutorial shows you how to build a price tracker using Python requests and BeautifulSoup via web scraping.
How Price Tracking by Web Scraping Works
A Python price monitor that uses web scraping periodically scrapes prices from an e-commerce website and triggers an alert.
You would need a list of product URLs. The tracker would extract prices from each URL and alert via email when the price reaches the target price.
Depending on the website, the scraper may use either HTTP requests or automated browsers. This tutorial uses the first method, using HTTP requests.
How to Build a Price Tracker: The Environment
To build a Python price tracker, you require BeautifulSoup and Python requests. These are external Python libraries, which you can install using pip.
pip install bs4 requestsThe tutorial uses Pandas to read CSV files. Pandas is also an external Python library that can be installed using pip.
pip install pandasYou can send alerts using the module smtplib, which is already included in the Python standard library. Therefore, you don’t need to install it.
The code also uses two other modules, sleep and re, which are included in the Python standard library. The sleep module allows you to pause the script and re allows you to use RegEx.
How to Build a Price Tracker: The Code
![]()
Import the packages necessary to run this price tracker code.
from bs4 import BeautifulSoup
from time import sleep
import requests, re
import smtplib
import pandasDefine headers that allow you to circumvent Costco’s anti-scraping measures, which block HTTP requests that do not originate from a browser.
headers = {
"accept": "text/html,application/xhtml+xml,application/xml;q=0.9,image/webp,image/apng,"
"*/*;q=0.8,application/signed-exchange;v=b3;q=0.9",
"accept-language": "en-GB;q=0.9,en-US;q=0.8,en;q=0.7",
"dpr": "1",
"sec-fetch-dest": "document",
"sec-fetch-mode": "navigate",
"sec-fetch-site": "none",
"sec-fetch-user": "?1",
"upgrade-insecure-requests": "1",
"user-agent": "Mozilla/5.0 (Windows NT 10.0; Win64; x64) "
"AppleWebKit/537.36 (KHTML, like Gecko) Chrome/119.0.0.0 Safari/537.36",
}
The code uses four functions:
- getUrls()
- makeSoup():
- getPrice()
- trigger()
getUrls()
This function reads a CSV file using the read_csv() method. The file contains product URLs and target prices, which the function extracts and returns.
def getUrls(file):
with open(file) as f:
urls = pandas.read_csv(f)
return [urls['URLs'],urls['target']]makeSoup()
This function accepts a URL. It makes an HTTP request to the URL and parses the using BeautifulSoup. Then it returns the created BeautifulSoup object.
def makeSoup(url):
source = requests.get(url,headers=headers).text
soup = BeautifulSoup(source)
return soup getPrice()
getPrice() accepts two arguments:
- A URL
- A target price
It calls makeSoup(), with the URL as the argument, and gets a BeautifulSoup object.
The code in this tutorial monitors Costco.com; the website stores the price inside a script tag inside a variable adobeProductDatad.
<script>
var adobeProductData = [{
SKU: initialize('1809712'),
currencyCode: 'USD',
name: 'ASUS ROG Strix G18 18\" Gaming Laptop - 14th Gen Intel Core i9-14900HX (24-Core) - GeForce RTX 4060, 8GB \u2013 2.5K (2560 x 1600) 240Hz Display - Windows 11',
priceTotal: initialize(1899.99),
product: document.getElementsByTagName("title")[0].baseURI.split('?')[0] ,
productCategories: [],
productImageUrl: 'https://cdn.bfldr.com/U447IH35/as/qv38ptt6wjqn86tmpqp8p69z/1809712-847__1?auto=webp&format=jpg',
quantity: 1, //This value will be overwritten in getProductItemsDetails function in adobe-analytics-events.js if item is OOS
unitOfMeasure: ''
}]
function initialize (parameter) {
if (typeof parameter != 'undefined' && parameter != null && parameter != '') {
return parameter;
} else {
return ' ';
}
}
window.onload = function () {
if(!($('#mymdGenericItemNumber').length > 0 && $('#mymdGenericItemNumber').val() == adobeProductData[0].SKU)){
COSTCO.AdobeEvents.initEventIfLoggedIn('commerce.productViews', adobeProductData, adobeAnalyticsCommonData, contextVariables);
}
}
</script>
However, the script doesn’t have any ID or Class to locate it. Therefore, find all the scripts and iterate through them. In each iteration:
- Check if the script text has the string “adobeProductData = [“
- Pass the script with the string to the variable reqScript
reqScript = ""
for script in scripts:
if "adobeProductData = [" in script.text:
reqScript = script.textNow you can extract the product price and name from the reqScript variable.
Use the search() method of re module to find the price and name.
price = re.search(r"priceTotal:.+\((.+)\)",reqScript).group(1)
name = re.search(r"name: '(.+)'",reqScript).group(1)Next, check if the extracted price is less than or equal to the target price. If so, call trigger() to send the alert mail.
if float(price) <= float(target):
trigger(name,url,price)
else:
print("The price is still above the target")Finally, the function returns the name and the price.
return [name, float(price)]trigger()
The trigger() function accepts the product name, product URL, and price. It uses them to build a message body and sends an email using the smptlib module.
def trigger(name,url,price):
subject = f"Price Drop for {name}"
body = f"Price of {name} has become {price}. Go here {url}"
message = f"Subject:{subject}\n\n{body}"
sender ="sender@example.com"
receiver = "receiver@example.com"
password = "example#password123"
with smtplib.SMTP_SSL("smtp.gmail.com", 465) as server:
server.login(sender, password) # Replace "your_password" with your actual password
server.sendmail(sender, receiver, message)Note: Replace the email IDs and passwords appropriately. Depending on the email service, you may need to create an app password.
The next step is to integrate all the functions defined above.
Call getUrls () to get URLs and targets from the CSV file. The function will return a list containing both URLs and targets.
urlsAndTargets = getUrls("urls.csv")Separate URLs and Targets from the returned list. You can use the array indexes for that.
urls = urlsAndTargets[0]
targets = urlsAndTargets[1]Simultaneously, iterate through both the extracted list using the zip() function. This way, you can get the target price corresponding to the URL.
In each iteration, call getPrice() with the URL and the target price as arguments and append the returned value to an array.
for url,target in zip(urls,targets):
print(url,target)
try:
prices.append(getPrice(url,target))
except Exception as e:
print(e)
continueFinally, convert the array to a Pandas data frame and save the data frame as a CSV file.
pandas.DataFrame(prices,columns=['Name','Price']).to_csv('prices.csv')Scheduling the Price Tracker
Now that you have created the price tracker, you can schedule it to run routinely. This tutorial will use Windows Task Scheduler to do that.
First, create a Windows Batch Script (.bat). This script will navigate to the appropriate directory and call the Python script.
cd /d "<path/to/scriptfolder/”
</path/to/python.exe> priceMonitoring.py
The above script:
- Navigates to the folder where the Python script exists.
- Runs priceMonitoring.py
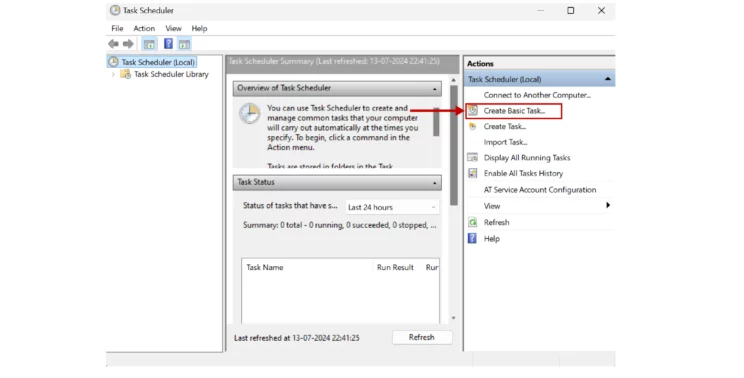
You can schedule this Windows Batch Script using the Task Scheduler.
- Open Task Scheduler and click ‘Create Basic Task’
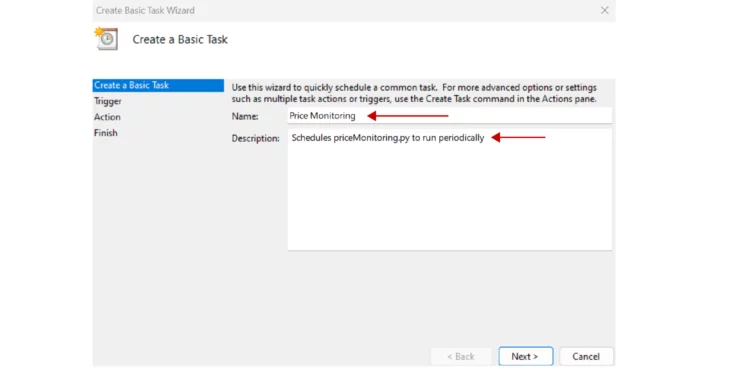
- Fill in the details of your scheduler
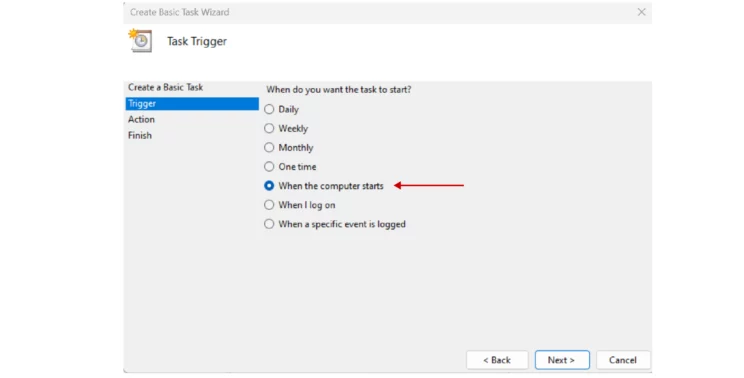
- Select the frequency of execution
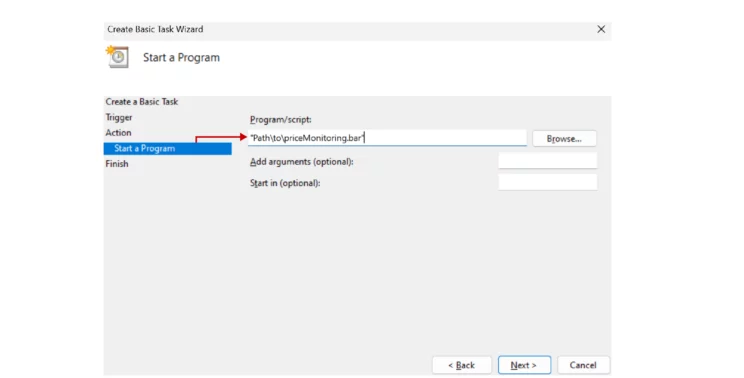
- Select start a program
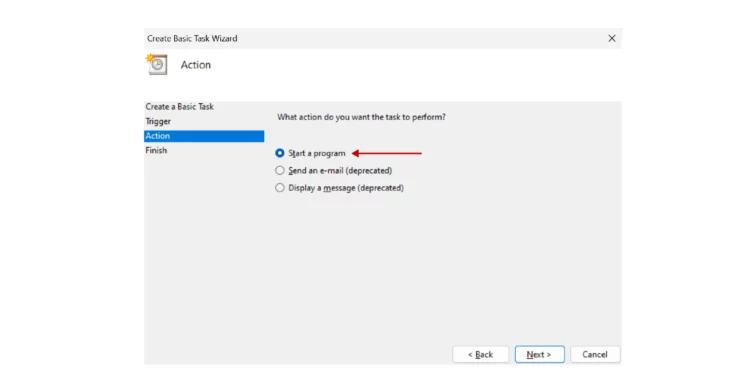
- Browse and select the Windows Batch File created earlier.
- Click Finish
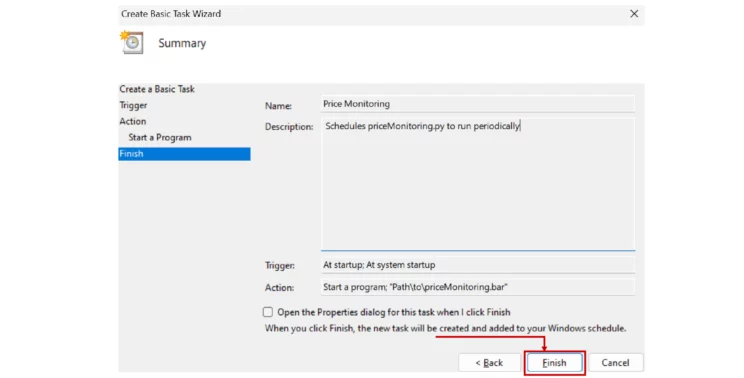
You have now scheduled your price monitoring script to run periodically.
Code Limitations
The code shown in this tutorial can monitor prices with Python. Specifically, it can monitor Costco product prices but consider the following limitations:
- Cannot monitor product prices on other e-commerce websites
- Requires additional code for large-scale price monitoring to navigate anti-scraping measures like proxy rotation
- Requires updating the code when Costco.com changes the website structure
Wrapping Up
Price monitoring is possible with Python. Essentially, you create a web scraping script that periodically scrapes prices and alerts via email whenever the price is below your target price.
The code shown in this tutorial can only monitor Costco products; you may update the code for other e-commerce sites.
You also need to change the code for large-scale web scraping or whenever Costco changes the website structure.
However, you can avoid learning how to build a price tracker if you choose ScrapeHero. ScrapeHero Price Monitoring Service can do all that for you.
ScrapeHero is an enterprise-grade web scraping service provider. ScrapeHero services also include product and brand monitoring and custom robotic process automation.
We can help with your data or automation needs
Turn the Internet into meaningful, structured and usable data