How to configure an Amazon S3 bucket to allow ScrapeHero to write data and images

We will assume that you have already created your Amazon S3 account. If not, then go here to do that: http://aws.amazon.com

What we will need from you

At the end of this exercise, we will need 2 things from you through an email or in response to the ticket.

These two items are marked with this icon

  1. The Name of the Bucket & AWS Region that you create in Step 1
  2. The CSV file containing the Access Key and the Secret Access Key that you downloaded from AWS in Step 3

STEP 1: Create a new Bucket

A bucket is like a folder where we can write files or read file from – like a Windows or FTP folder

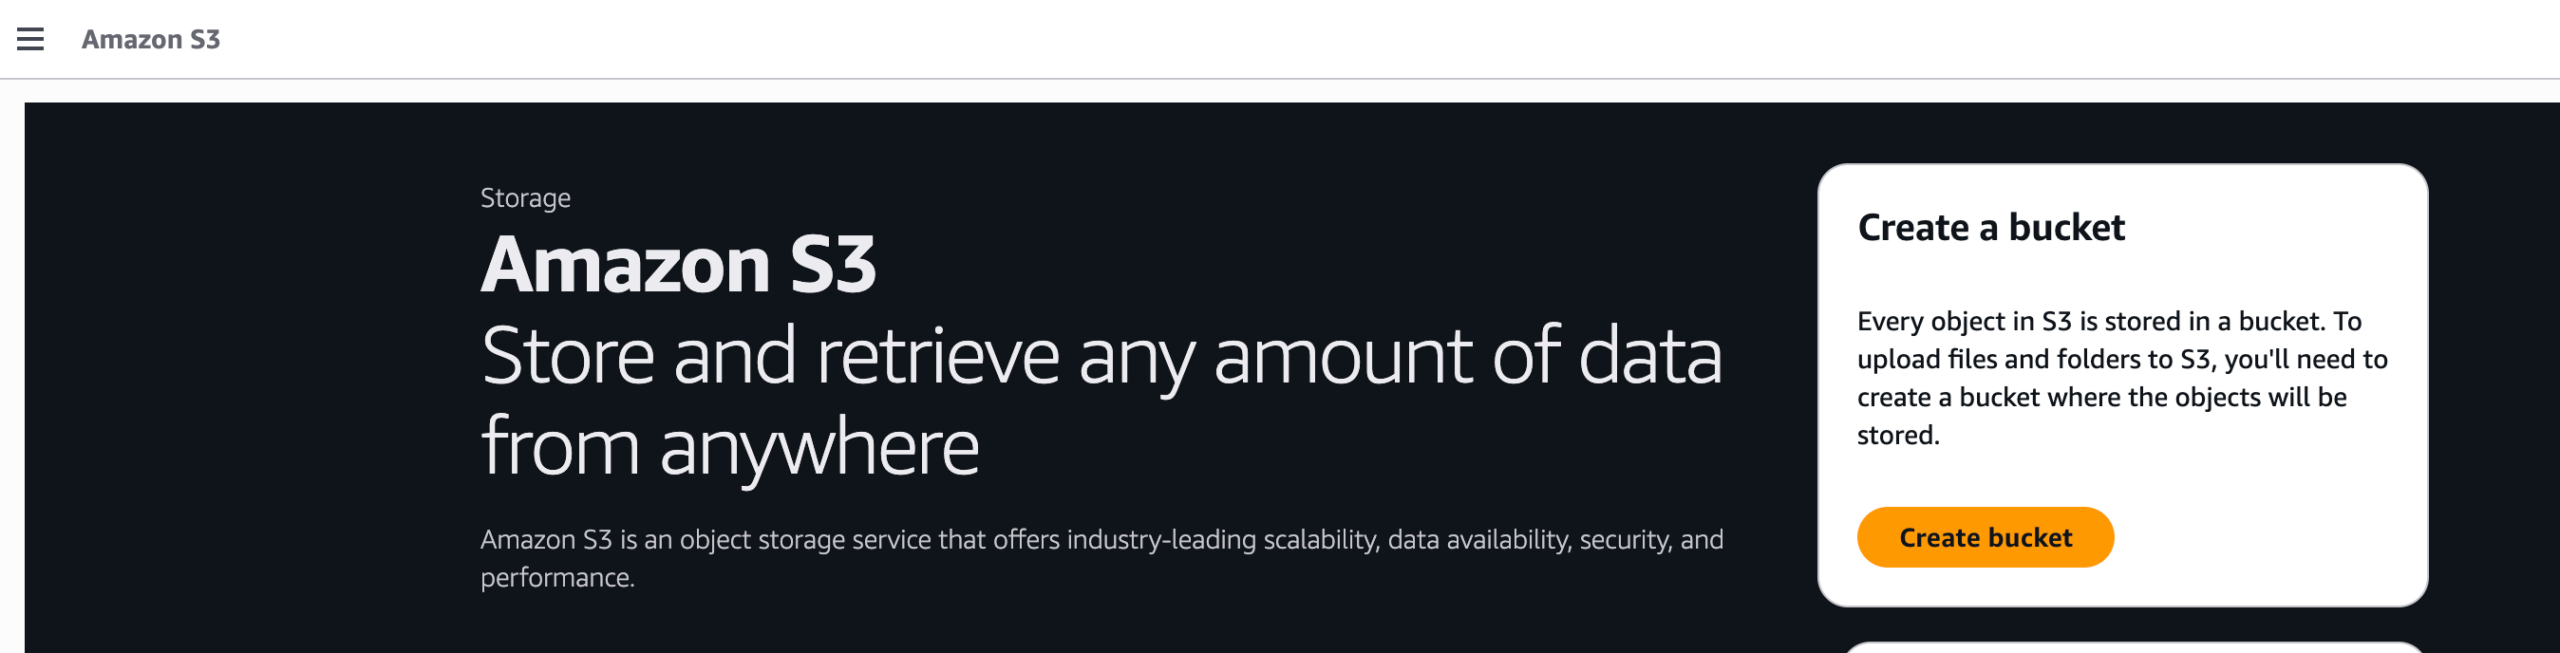
Go to the S3 area in AWS

Click the Create bucket button

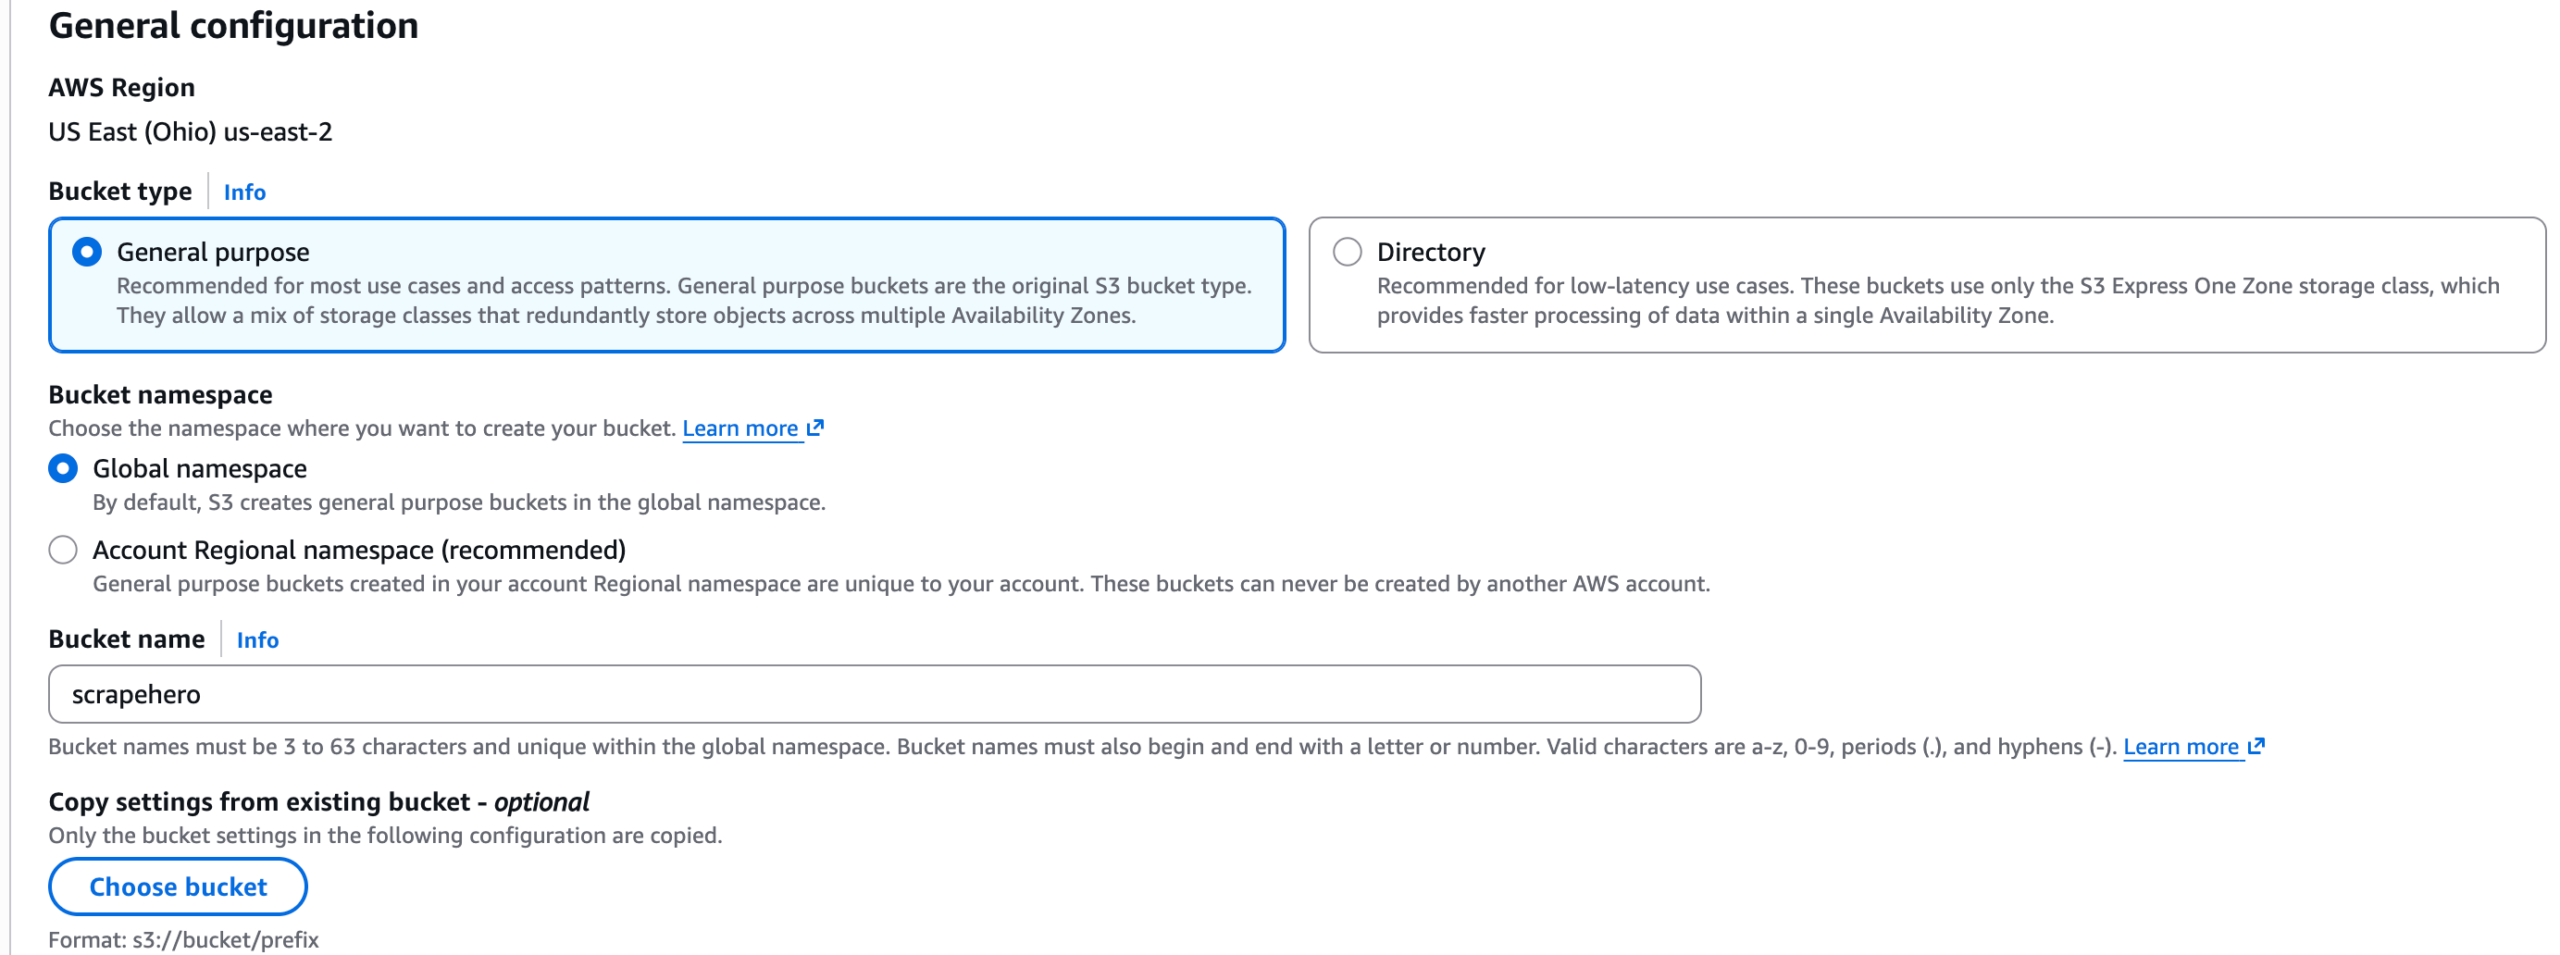
Enter a name for the Bucket (the bucket name should be unique) – For the rest of the article, we will be using this same name for the bucket, so please use that name.

Keep scrolling down and DO NOT change or add any values in any of the other sections. Till you see the Create bucket button on the bottom right, click the Create bucket button.

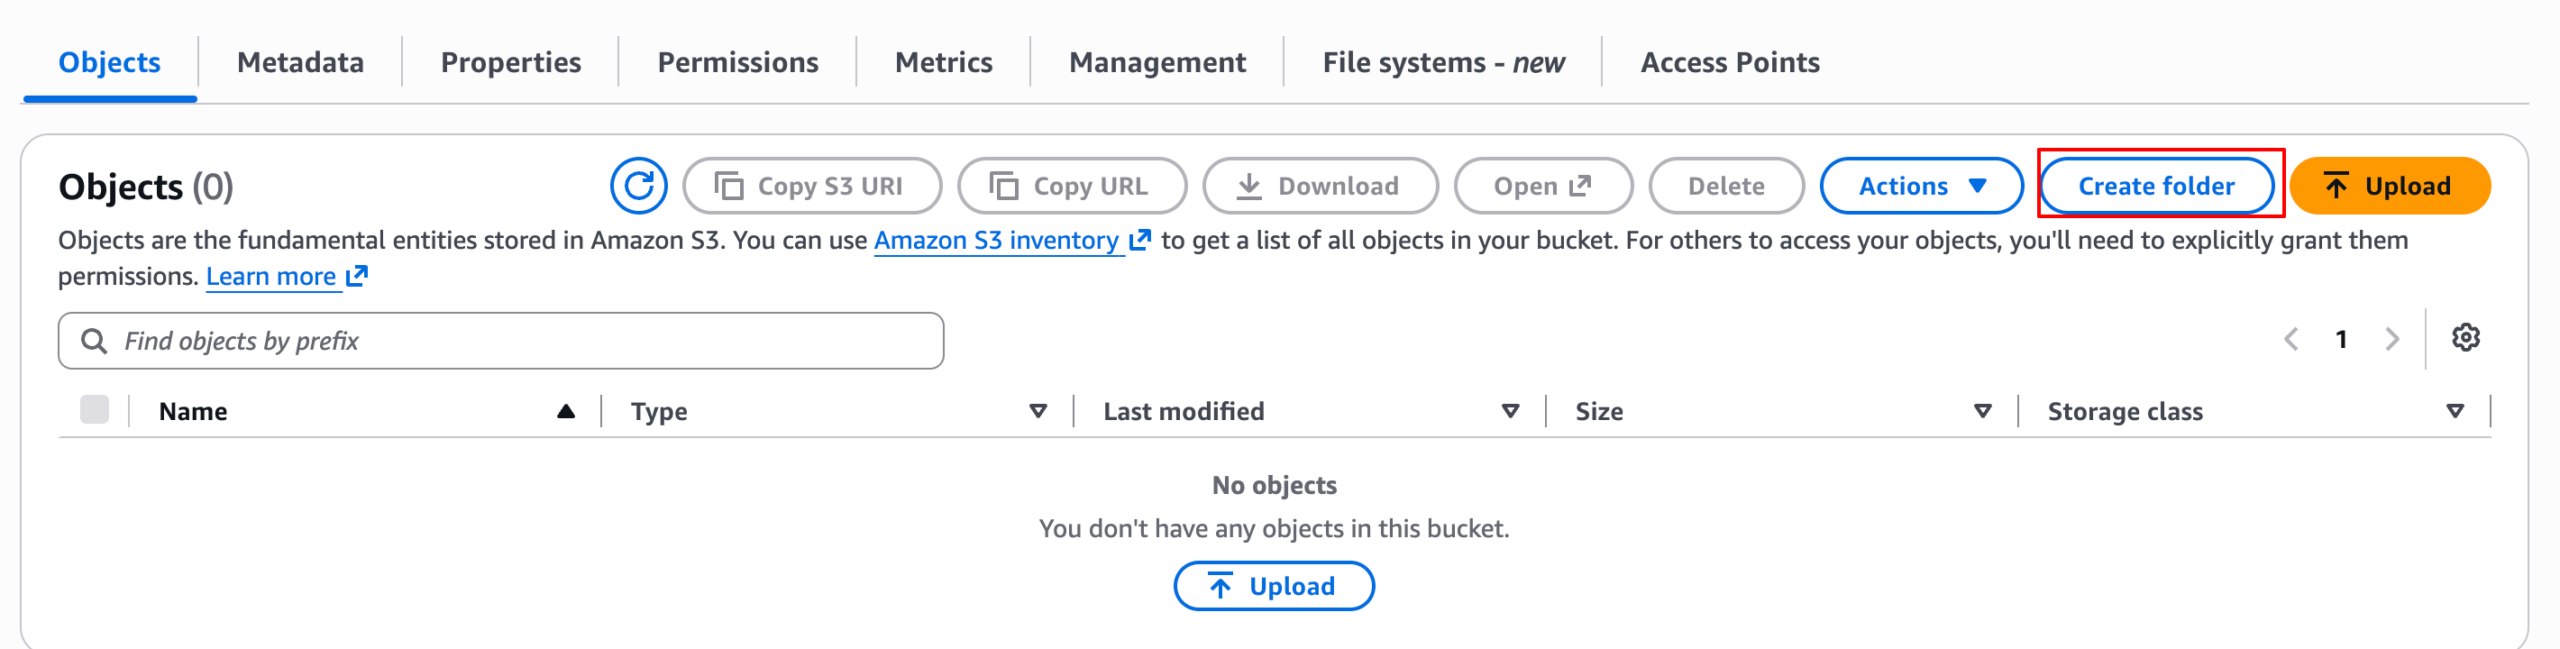
Create a folder (or multiple folders – Optional) to organize the data

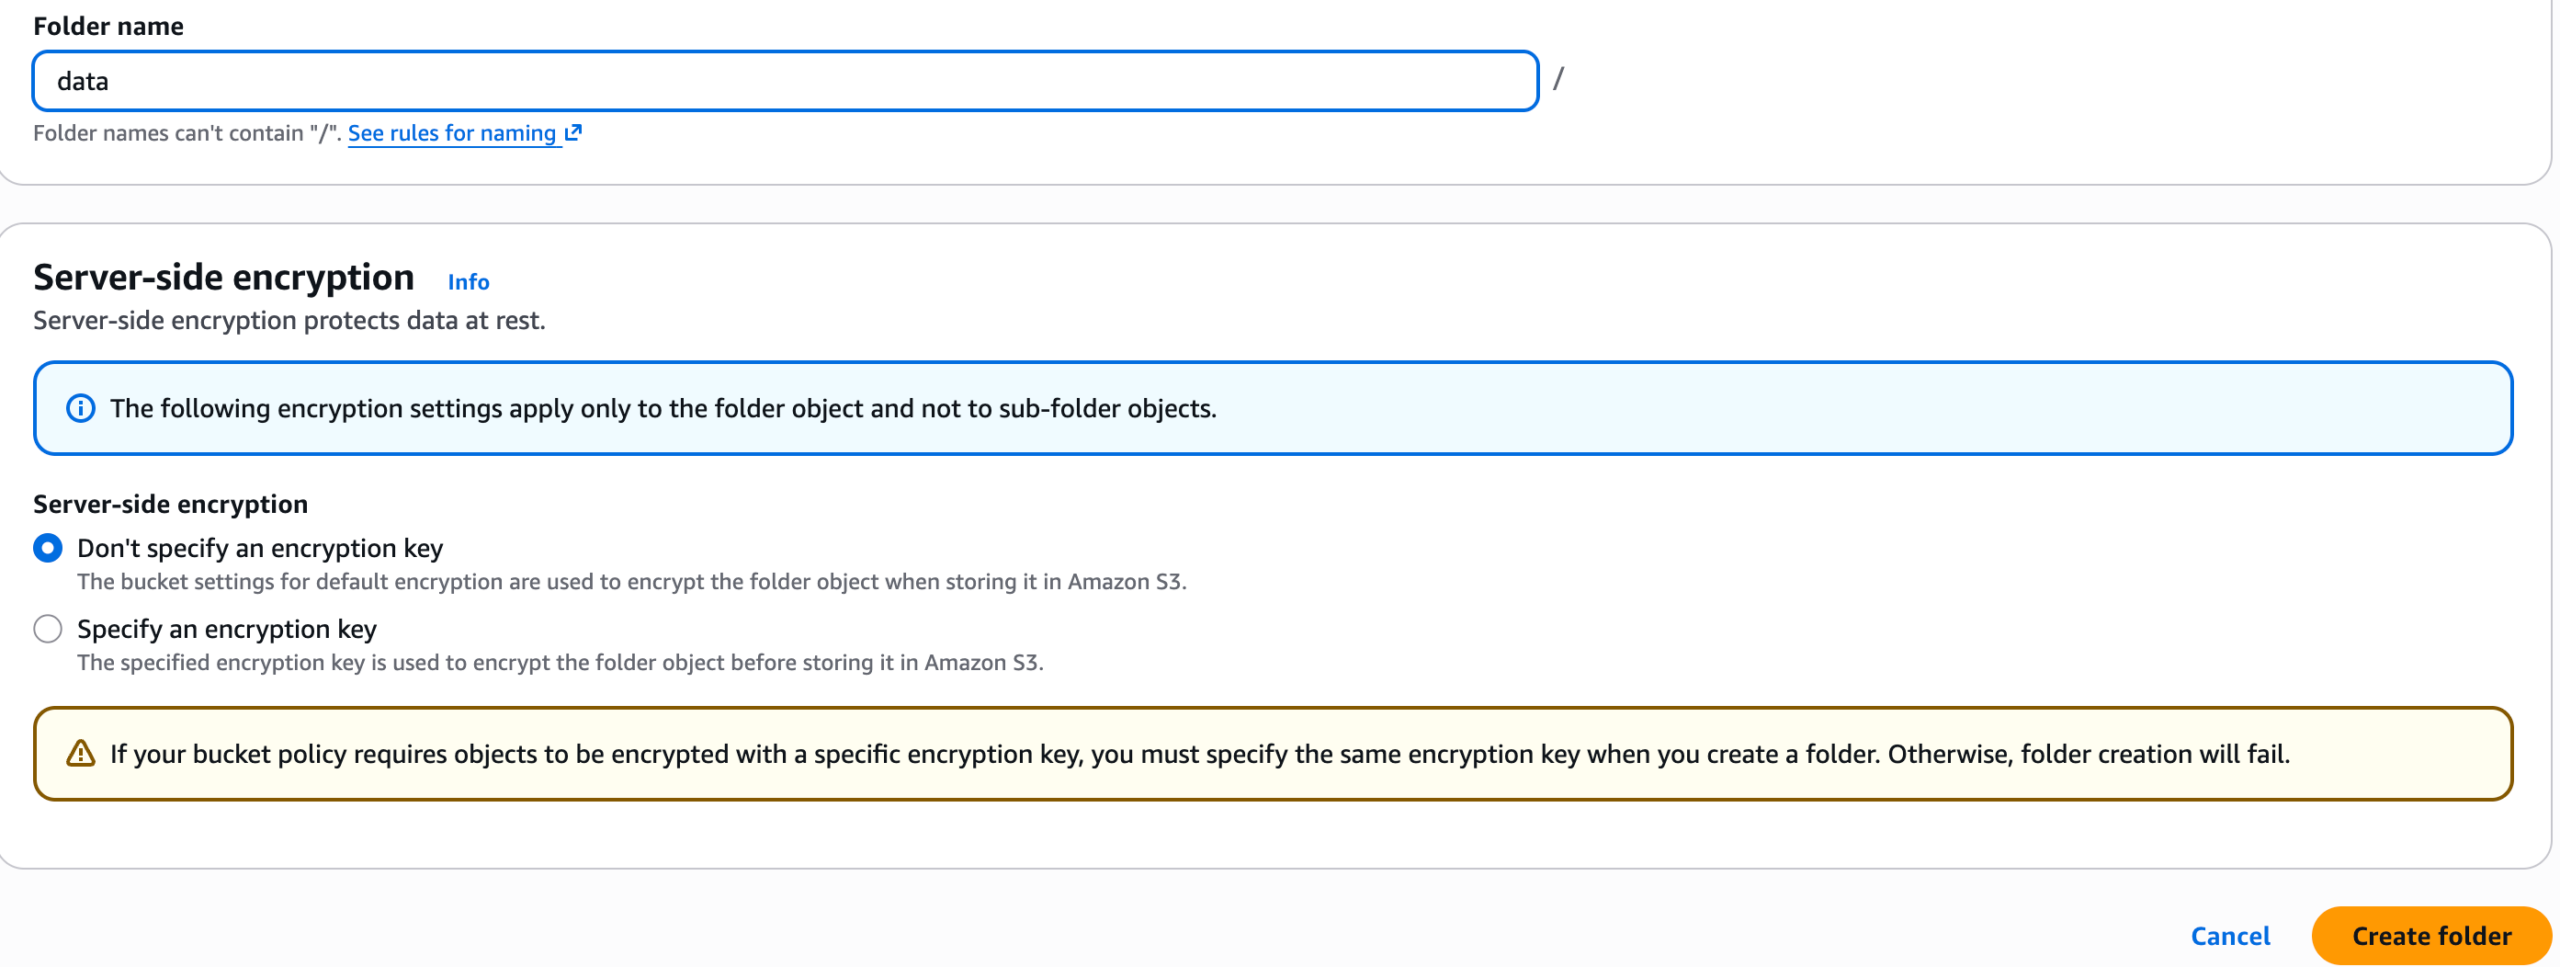
We need AT LEAST one folder created in this bucket – let’s call it data

Click Save to create the folder

Please copy the name of this bucket and email us the NAME of this BUCKET 

STEP 2: Create a new Policy

This policy restricts access for scrapehero to just this S3 bucket (not your full S3 folders)

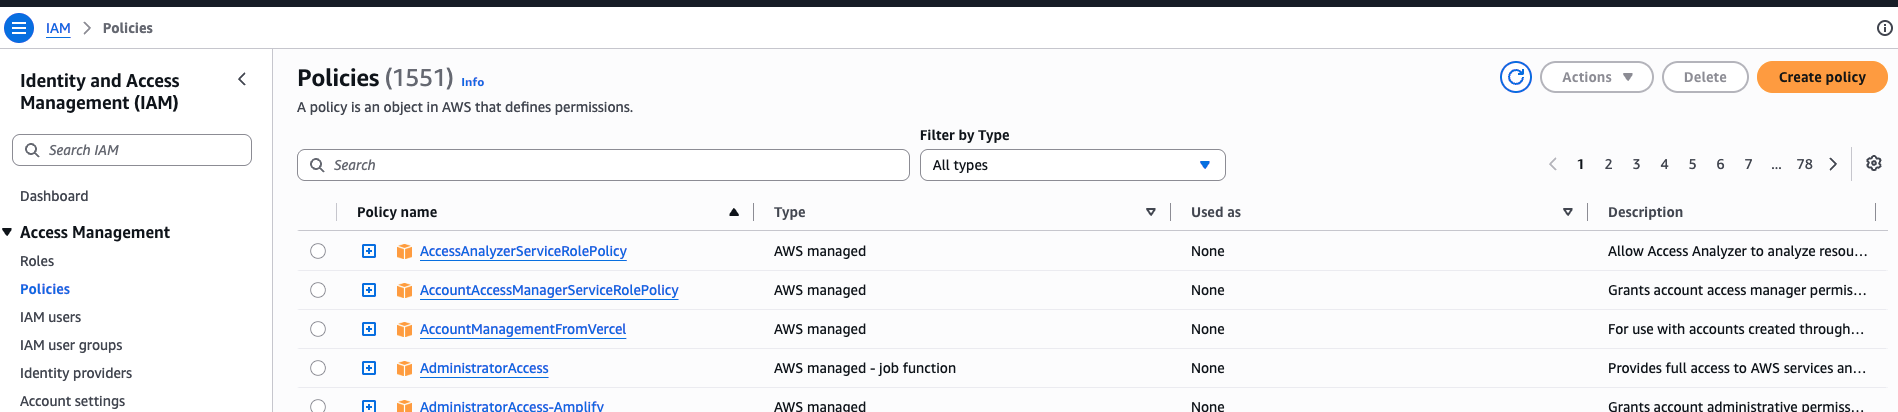
Go to IAM – Policies

Click the Create Policy Button

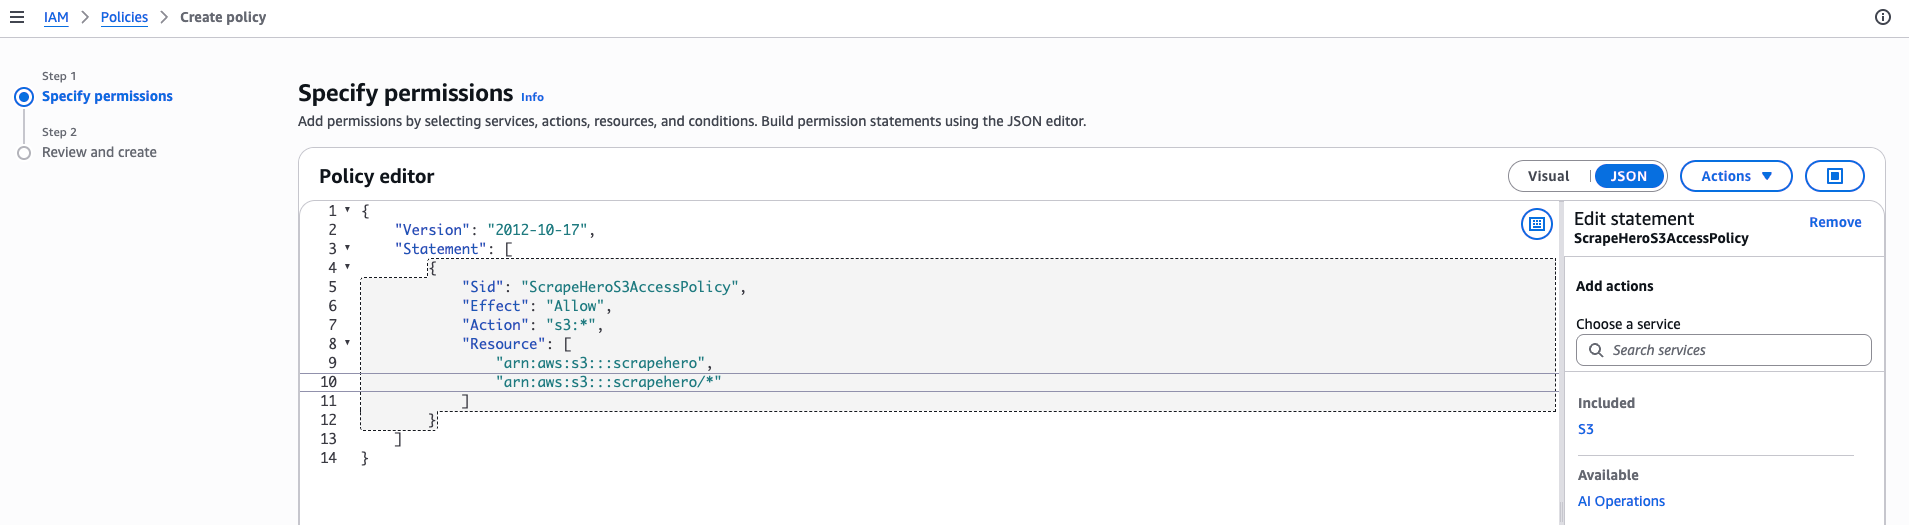
Select the JSON option from the top right. Then, in the Policy editor, copy and paste the following.


{

    “Version”: “2012-10-17”,

    “Statement”: [

        {

            “Sid”: “ScrapeHeroS3AccessPolicy”,

            “Effect”: “Allow”,

            “Action”: “s3:*”,

            “Resource”: [

                “arn:aws:s3:::scrapehero”,

                “arn:aws:s3:::scrapehero/*”

            ]

        }

    ]

}


Click the Next button, give the policy a name such as ScrapeHeroS3AccessPolicy and click the Create policy button.

STEP 3: Create a new User

For a secure configuration, you will need create a new user for ScrapeHero (say it is named scrapehero) with its own access and secret keys (which can be done using the Amazon AWS console’s “IAM” service), then you will need to make sure that that user has enough permissions.

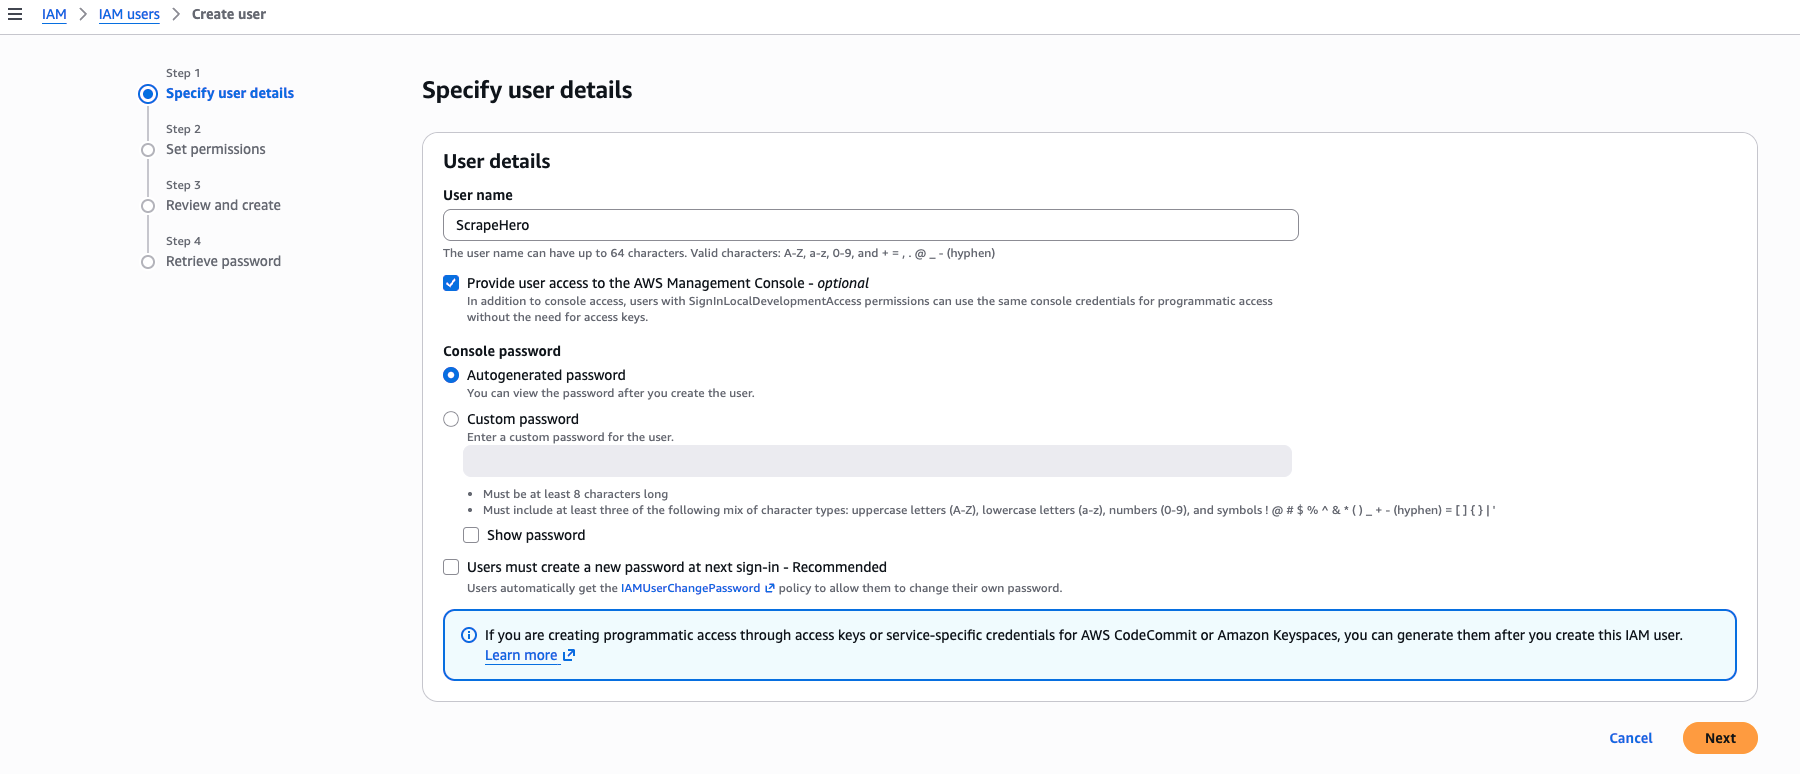
Go to the Identity and Access Management (IAM) console in Amazon AWS – Users – Add user

Create a user named ScrapeHero, then click the “Provide user access to the AWS Management Console” checkbox.

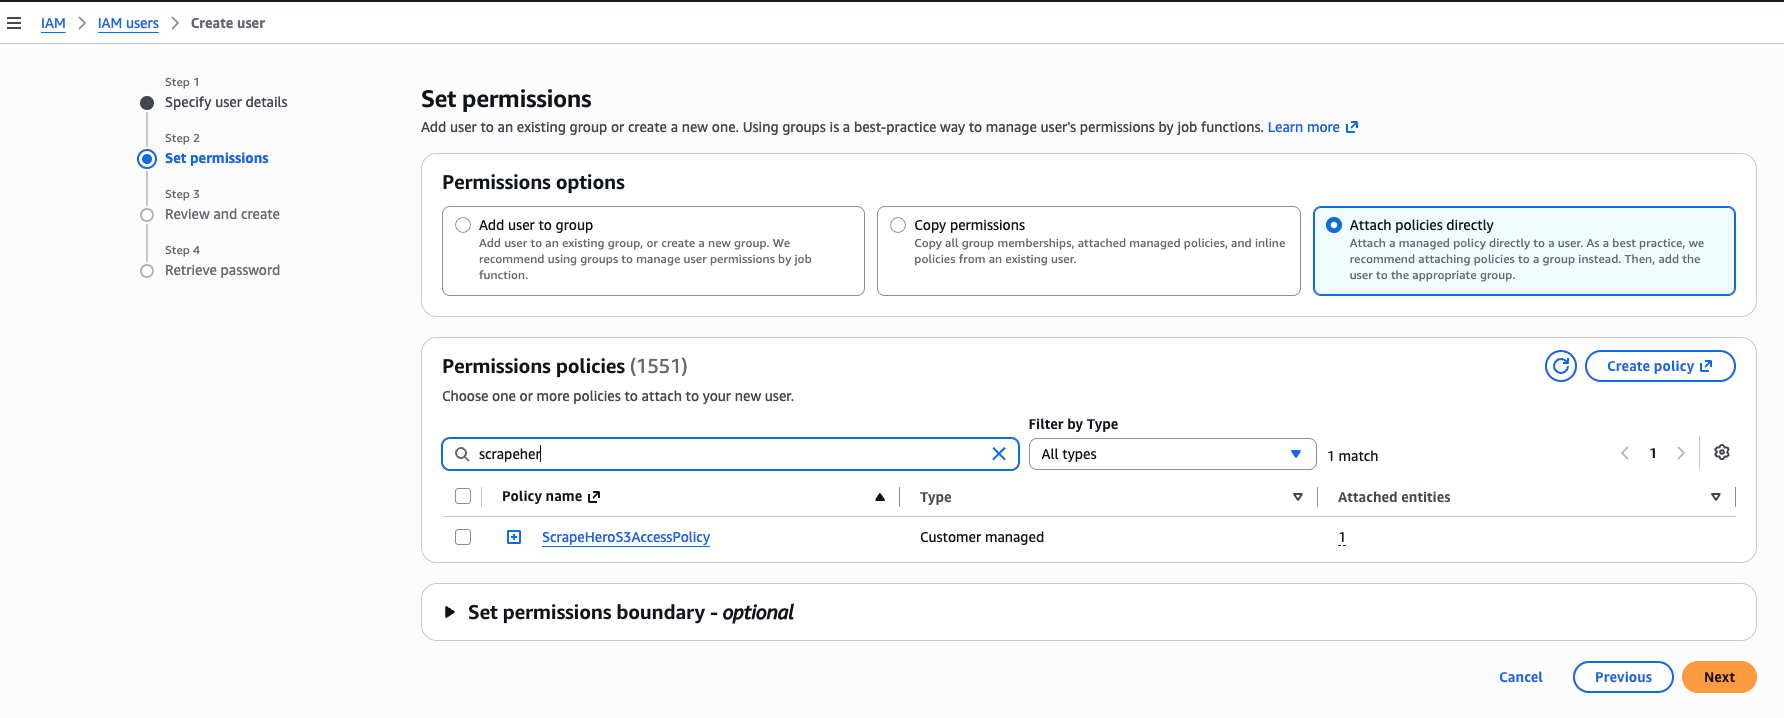
Click Next and select Attach policies directly and search for the already created policy “ScrapeHeroS3AccessPolicy”. Select the created policy and click Next. Then click the Create user button.

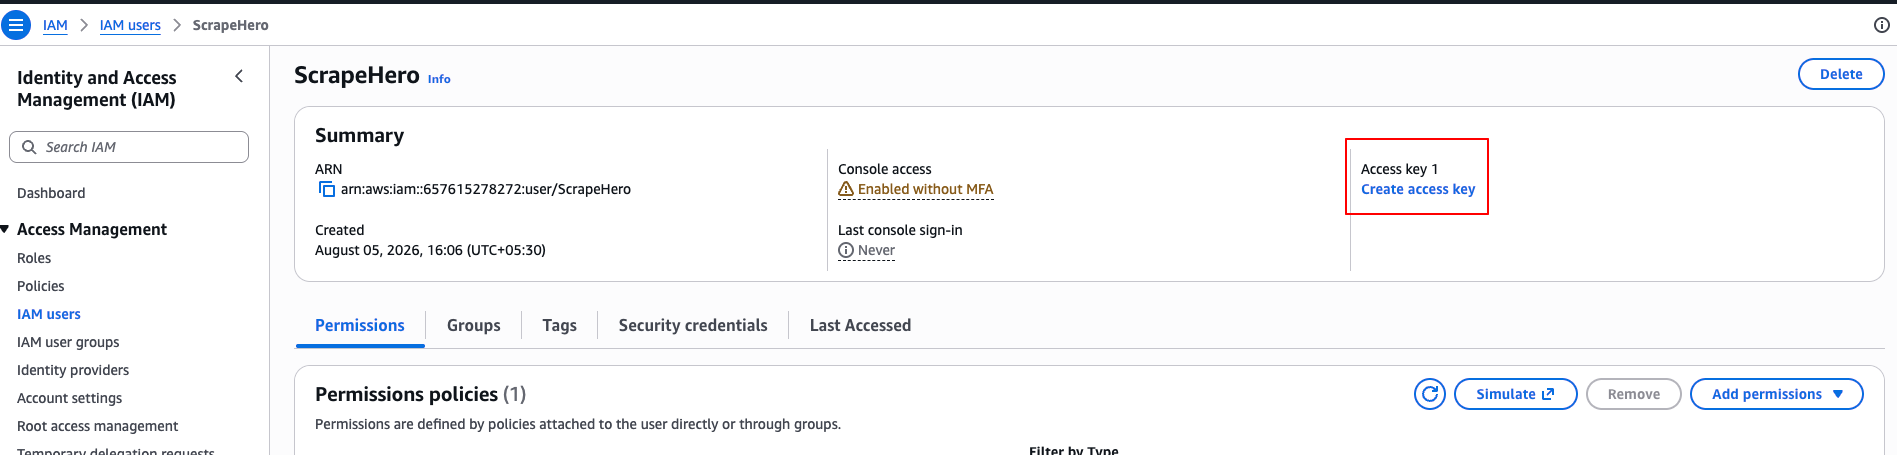
Then return to the users list and select the created user. Select the ‘Create access key’ option.

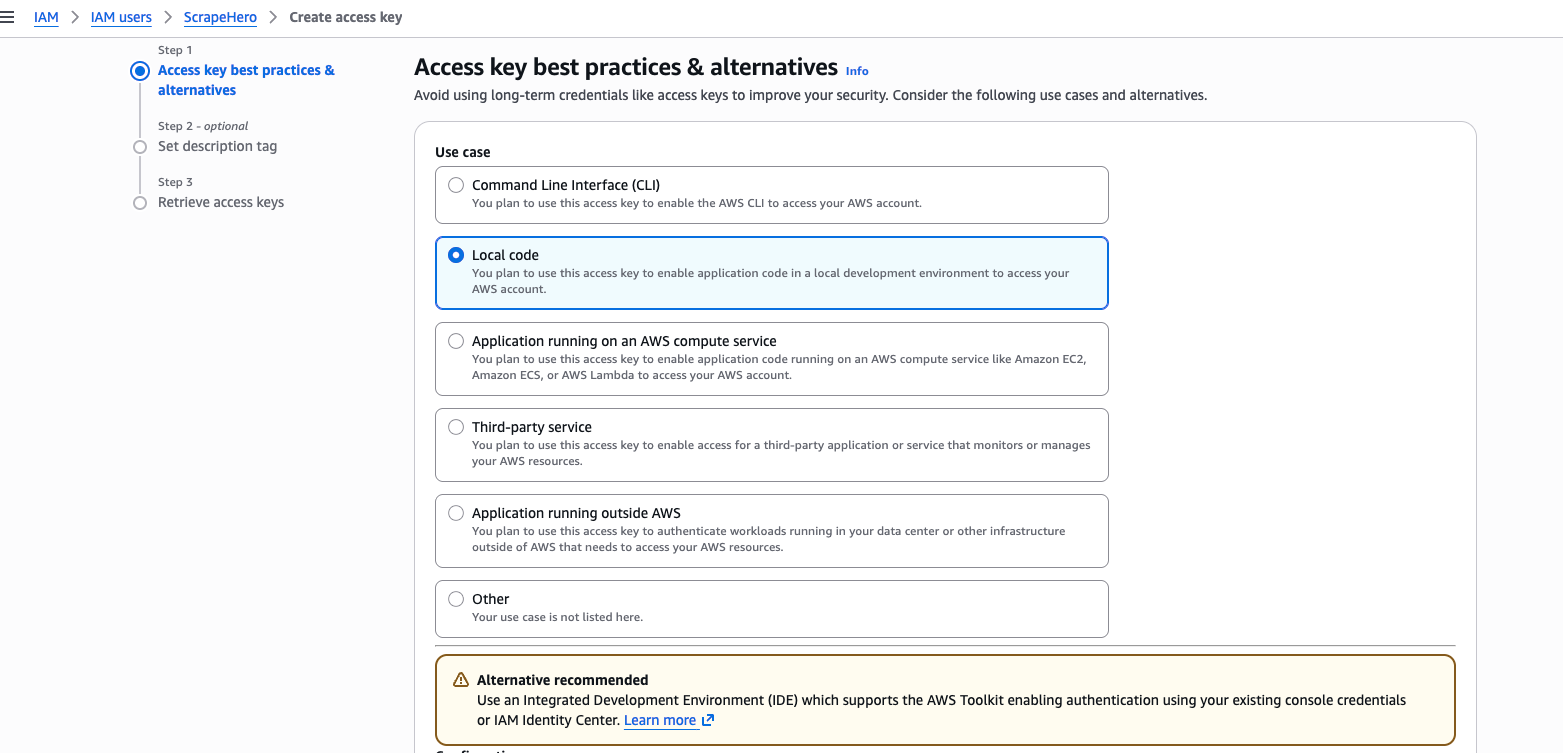
Select the use case as ‘Local Code’ and click the Next button.

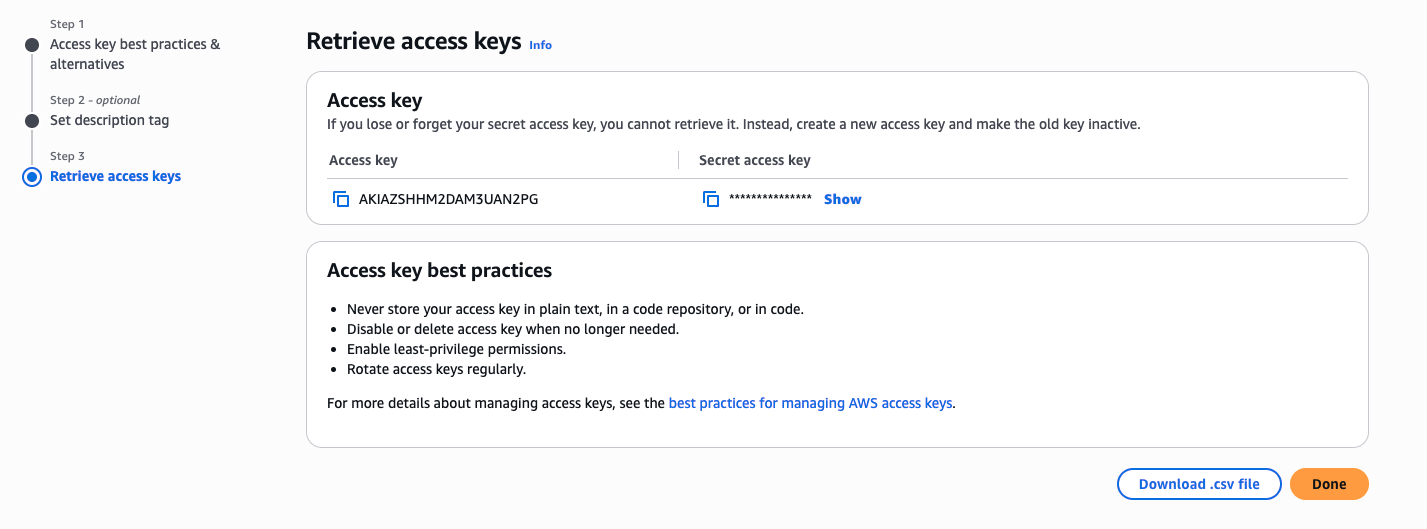
Then click Create access key.

On the next page, you will HAVE THE ONLY CHANCE TO SEE THE CREDENTIALS and DOWNLOAD them to send to us.

Click the Download CSV button

Download this file and email that to us